Auto mounting a drive in Linux
The goal here is to automatically mount an SSD drive I added internally to my laptop when I boot it up.
Creating the directory structure
We will be mounting the drive to /media/data. The /media folder is where you should be mounting drives on a Linux system. I am on Arch, which does not come with this folder out of the box, so I will have to create it and the data folder, which is the name I am giving the drive I am mounting. You can name yours anything you'd like.
cd /
sudo mkdir media
cd media
sudo mkdir data
Getting information on the drive to be mounted
Next we'll need some information on the drive that we'll be mounting. Most importantly its UUID, which is an id the system uses to recognize this drive.
First well use lsblk to find the right drive.
lsblkThis will list all drives on your system. Usually it's easy to see which name is associated with your drive by looking at the size of the drives. This is my output:
NAME        MAJ:MIN RM   SIZE RO TYPE MOUNTPOINTS
sda           8:0    1  57.3G  0 disk
├─sda1        8:1    1   798M  0 part
└─sda2        8:2    1    15M  0 part
zram0       254:0    0     4G  0 disk [SWAP]
nvme1n1     259:0    0 465.8G  0 disk
├─nvme1n1p1 259:3    0   511M  0 part /boot
└─nvme1n1p2 259:4    0 465.3G  0 part /home
                                      /var/cache/pacman/pkg
                                      /var/log
                                      /.snapshots
                                      /
nvme0n1     259:1    0   1.9T  0 disk
└─nvme0n1p1 259:2    0   1.9T  0 part
The drive I want is the one with 1.9T of storage space and I would like to use the "nvme0n1p1" partition on it. We will need this ID in the next command:
sudo blkid | grep [ID]This will provide you with an output which has all the information on your drive. Mine looks like this:
/dev/nvme1n1p1: LABEL="Data" UUID="ab8bbd93-ebbf-4827-b08c-6d89efe123ef" UUID_SUB="a0133592-e3ce-4879-a41d-cd1b181753b0" BLOCK_SIZE="4096" TYPE="btrfs" PARTUUID="f0a17384-01"Adding the drive to fstab
Auto mount magic will be done for us by fstab. Open the fstab file, replacing [your editor] with the editor of your choice. If you're unsure, you can use nano.
sudo [your editor] /etc/fstabWe will now add our drive to the bottom of the fstab file in the following format:
# [name]
UUID=[uuid of your drive] [mount point] [file system type] [mount option] [dump] [pass]- [name] is not needed, but makes it easier to identify the drive. You can name it anything you like. The hash symbol in front of it is needed, as this is a comment.
- [uuid of your drive] is the id we got from the blkid command.
- [mount point] is where we want to mount the drive. This is the location we created in the first step, /media/data in my case.
- [file system type] is exactly what is says. This is specified as TYPE in the blkid command. It is btrfs in my case.
- [mount option] I am not getting into right now. Setting it to defaults is fine.
- [dump] is meant for stating if this drive should be enabled or disabled when backing up. 0 would be disabling it, 1 enabling it. I will be disabling it.
- [pass] controls if fsck should check the device for errors on boot time. Root devices should always be on 1. Other partitions on 2, or 0 to disable checking. I am setting this to 0, thus disabling it.
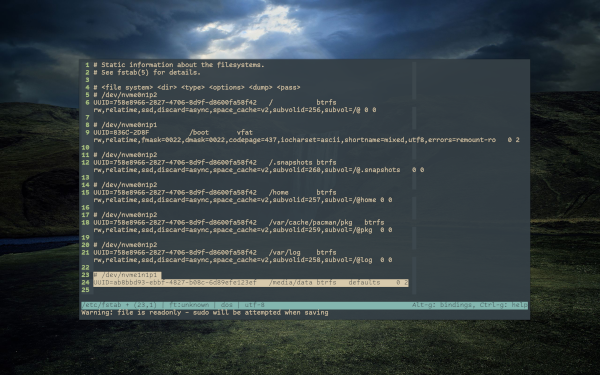
Putting it all together I will add the following to the fstab file:
# /dev/nvme1n1p1
UUID=ab8bbd93-ebbf-4827-b08c-6d89efe123ef /media/data btrfs defaults 0 0
Save and close the file.
Enable the changes
We will first reload the daemon so systemd will use the newly modified version of fstab.
sudo systemctl daemon-reloadNext we will mount the new drive manually.
sudo mount -aBe sure to check if there are any issues by taking a look at dmsg.
sudo dmesg -wHIf all went well, the new drive should be mounted. You can check in your file manager or re-run the lsblk command to see that after the name of your drive, there's now also a mount point listed.
Owning the drive
Considering this is all done by your system, chances are the file system on your drive is owned by root. This is not very handy, as you'd constantly would have to interact with it as root (through sudo). We do not want this, so we will be handing ownership of the entire media directory and everything in it to our user.
sudo chown -R [username] /media Where [username] would be your own username, obviously.
Reboot
Reboot to see it it all went fine. Remember, if there was a problem your system might not boot. You can edit fstab through a TTY at /etc/fstab.
And that's it. Every time you boot, your drive will boot with you!
