I’ve mentioned before that I have my website’s repository mirrored across multiple Git hosts. Well, it is not just the website; it is all my repositories. I have four hosts, namely: GitHub1, GitLab2, Codeberg3, and Bitbucket4. This is overkill, I know. I really like it, though. It gives me a warm, fuzzy feeling knowing my precious crap is safe. If one host goes down, I’ve got three others. If two go down, there are still two left. And if three go down… well, there’s probably something far more serious going on, but let’s not get distracted.
Four is a lot, but you might think that at least having a second one is not such a bad idea—and you’d be right. The process is super simple and short. No reason not to do it. I’ll walk through the process assuming we’re starting with nothing. This is a new repository you’re going to set up.
The setup
The first step is to go to all your Git providers and create a new repository. We’ll use this website’s repository as an example. My username across almost all the hosts—darn that user on Bitbucket—is jorisvandijk, so substitute that for your own username where applicable. The repository is, unsurprisingly, called website. How original.
In your browser
For each host you want to have this repository on, create a new repository there. Make sure it is completely empty. Don’t initialize with a README.md! The process differs from host to host, so I can’t explain how to set up the repository in detail. You should be greeted by something like this when it is created:
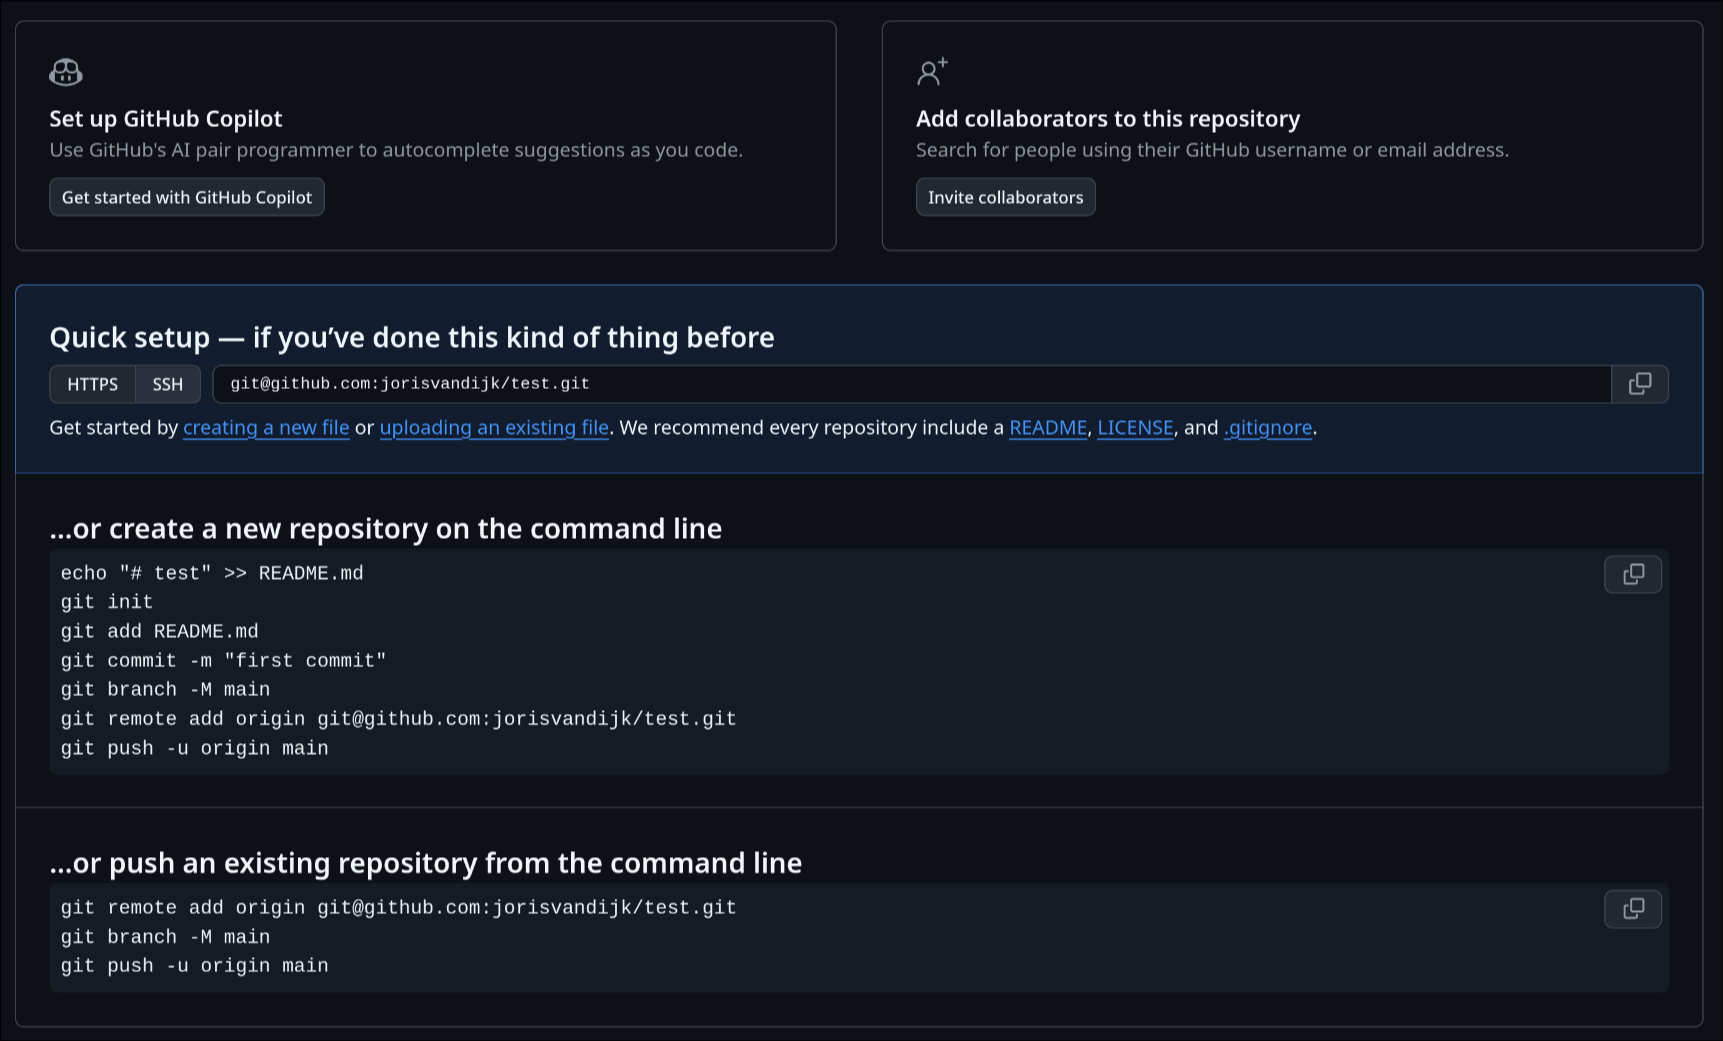
For simplicity’s sake, I suggest giving the repositories the same name across all hosts. You don’t have to though.
In your terminal
On your local machine open a terminal. Create a new directory where the repository will live locally. I have a dedicated ~/git/ directory where I keep all my Git repositories, so I’ll go there and create a new directory and enter it.
|
|
Here, we need to initialize a Git repository. Oh yeah, I am assuming you already have Git installed (as any Linux user should have); if not you’ll need to install it first. You likely know better how to install it on your system than I do, so I won’t explain it here. Right, let’s initialize the repository.
|
|
Next up is adding a remote. Now you’ll have to pick which of the Git hosts you want to name as your primary one. I went with Bitbucket for mine as I really like the user interface they have. Bitbucket does not have a public facing overview like GitLab or any of the others do, but I don’t think that matters all that much, as the content will be availible to the public on all other platforms anyway.
|
|
So far this has all been standard. You’d set up any Git repository like this. The following steps are the ones that count. Let’s now set the primary push URL to Bitbucket. We do this to explicitly tell Git this is where pushes go. Otherwise, Git simply assumes the fetch and push URLs are identical.
|
|
For each repository we want to mirror to, we’ll add another push URL. This means that when you issue git push, it will do so to all the repositories.
|
|
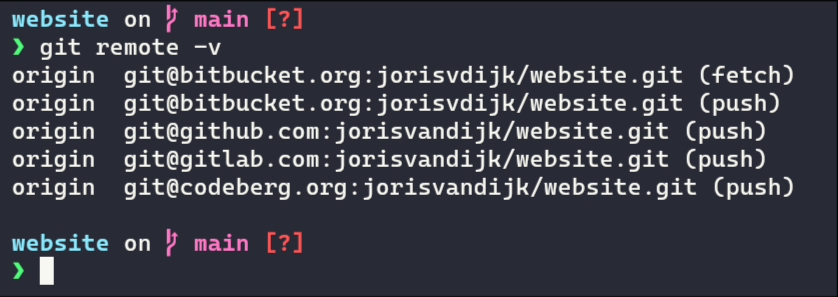
This should be it, but let’s check if it’s all set as we want before we proceed.
|
|
If all went well, the output should look like this:
Testing
Let’s now test whether it actually worked. We’ll create a README.md file in the repository and push that.
|
|
We’ll add this to Git, set a commit message, rename the branch to main and push.
|
|
Once the command is done running, it’s time to check if all repositories got the README.md file. Open your browser and visit the repositories on all your Git hosts to make sure everything works.
Future workflow
Now that everything is set up, you may be wondering “How do I use this setup when I want to do another push?” Fortunately, you do not have to learn anything new. It’s the normal git add ., git commit -m "your message" and git push process. This will now push to all repositories.
